I really enjoy creating sea glass jewelry. I consider it the icing on the cake of my sea glassing hobby. How lucky and I to be able to find the beautiful sea glass (or, as is the case with beautiful English Seaham Beach glass, purchase it) and then be able to “play” with it and then sell it? VERY lucky! It is also fun to look back over the course of a short year and a half and see how my styles and techniques have changed and improved.
When I started creating jewelry I used locally found sea glass and findings from local craft shops like Michael’s and A.C. Moore. This is exactly how my journey should have started.
Sea glassing was new to me. I hadn’t paid much attention to sea glass before even though I’d seen it used in jewelry in shops in places like Hatteras, North Carolina and Rock Hall, Maryland. I was shown a sea glassing area by someone I knew who had been shown the area by someone she met. It was a place on a river that was full of sea glass and pottery. I picked up each and every piece I saw and I wanted to start creating jewelry. But how to start?
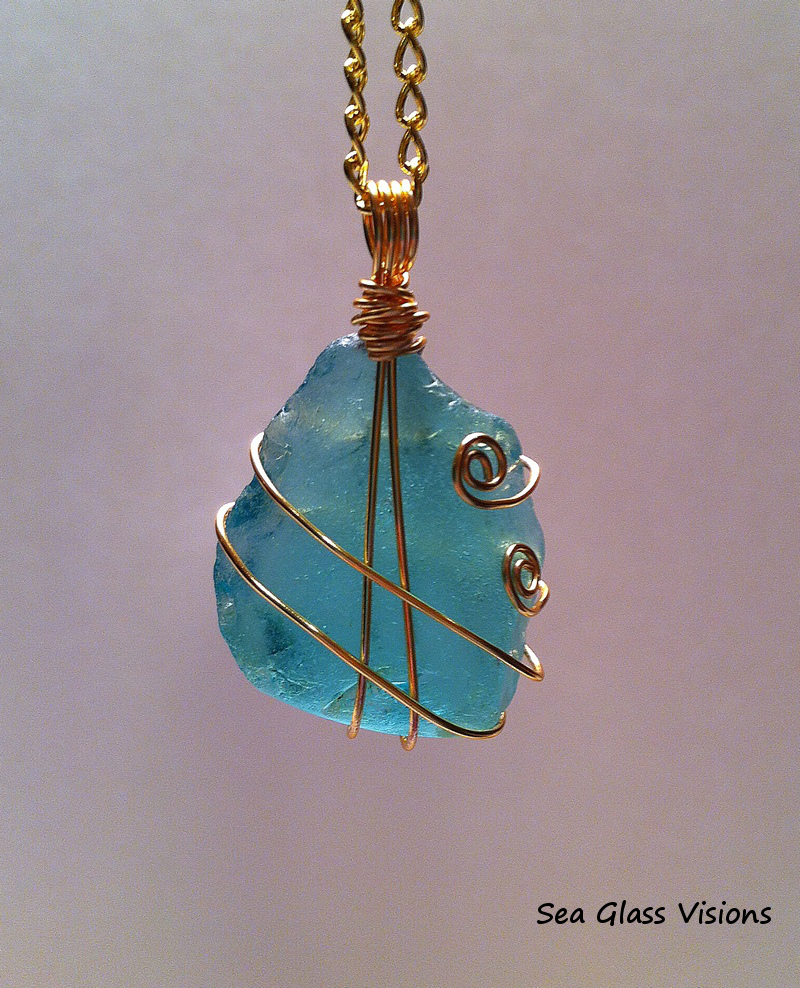
A beautiful piece of locally found sea glass with a simple gold tone wire wrap. Stunning.
I started by doing an online search about how to wire wrap sea glass. There are lots of different instructional videos on you tube. I watched the video then paused it, doing a section of the wrap just like the instructor did, then re-started the video watched it, paused it, making another section of the wrap and so on and so on. I learned there isn’t only one way to wrap sea glass and now, almost two years later wire wrapping has become second nature to me. Sometimes I use one piece of wire to wrap, sometimes I use two. Sometimes I start at the bottom of the piece of glass and work up to the bail, sometimes I start with the bail and work down. Sometimes I add a bit of “bling” with beading, sometimes not.
I went to my local craft stores Michael’s and A.C. Moore to purchase the wire and something else I learned I would need called “findings”. The wire was something I had to have in my hands and be using to really learn about it. I knew nothing about wire and didn’t know it is available in different thicknesses and hardnesses. The thickness of wire is called it’s gauge. The higher the gauge number the thinner the wire, the lower the gauge number the thicker the wire. Strange, I know, it seems backwards. I started practicing using thinner 22 gauge wire, but realized this isn’t a forgiving wire, it kinks easily. I quickly realized that I would want to use a heavier wire in order to safely and securely wrap the sea glass. I use a 20 gauge for most sea glass wrapping. I will sometimes use 22 gauge, especially for a smaller more delicate piece of glass or if I am using beads that have thin channels that a 20 gauge is too big for. I will often double up when using 22 gauge wire to wrap a piece of glass.
I also had to learn about findings. Findings are essentially jewelry making supplies. They include wire, chain, beads, crystals, jump rings, bails, clasps, crimp ends, and the list goes on. These things I bought at Michael’s and A.C. Moore too. They weren’t too expensive, but, as I’ve come to learn you definitely get what you pay for. The quality is alright, but not great. Again, this is exactly how my journey should have started.
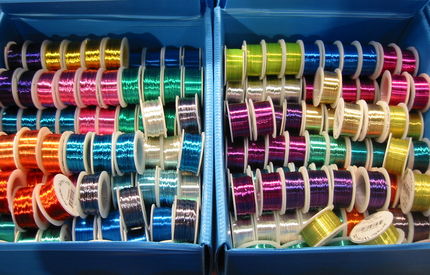
My favorite type of wire to use is the Artistic Brand. I generally use a non-tarnish or tarnish resistant silver and gold for most jewelry, but sometime a little color really adds something special. Here are some of the lovely wire colors available from Artistic Wire.
Over time my jewelry making skills improved and I realized people liked my jewelry style. I started selling my sea glass jewelry on my SeaGlassVisions shop on etsy, at crafts shows and in consignment shops.
One thing I always knew was that I wanted to create really well made and high quality jewelry. This is what led me to start purchasing sea glass and using sterling silver findings on some of my jewelry creations. Stay tuned!


